Bungalow planning
Bungalow Rendering: Low Sills and Long Wall Edges
A bungalow can look straightforward from the road: one storey, an uncomplicated roof and walls that seem easy to reach. Walk around it and the picture often changes. Low window sills, a long gutter line, an added porch and a patio close to the wall create details that need to work together. This guide explains how to include those details in a rendering brief before a colour is chosen or an area price is compared.

On this page
Walk the perimeter before measuring the broad faces
Start at the main entrance and follow the outside of the building in one direction. Give each elevation a simple label and photograph it from far enough back to show the roof and ground. Then photograph the interruptions: doors, windows, downpipes, vents, changes in roof height and adjoining structures. That sequence is easier to follow than a collection of unrelated close-ups.
Mark what is staying as it is. A brick plinth, exposed chimney, tiled panel or porch may be an intentional part of the finished appearance. Include it in the brief even though it is not being rendered, because the new surface has to meet and protect it. The same applies to a neighbour’s wall or a shared boundary beside a narrow passage.
The measured area can follow this survey of the layout. Otherwise it is easy to produce an accurate square-metre figure for an incomplete description. A low building may have less high-level wall, but a large proportion of its work can sit around edges and openings. Whole-house rendering needs to account for those features across the complete perimeter, not just the front elevation that first attracted attention.
Low sills deserve their own line in the scope
The distance between a sill and the ground can be limited, especially beside a raised path or terrace. The proposed finish needs a clear bottom edge and a sensible relationship to both the sill and the adjoining ground. Do not assume that the existing arrangement remains suitable simply because it has been there for years.
If landscaping is planned, share that information before the rendering detail is settled. A future change in paving level can alter the relationship to the wall base. It is much easier to coordinate those decisions on paper than to cut back a recently completed finish after the path is rebuilt.
At the sill itself, identify the retained projection, the underside and the returns beside the frame. A thin colour coating and a thicker replacement build-up have different consequences. If the proposal adds insulation, the opening needs a designed detail rather than a casual extension of an ordinary render specification.
Avoid giving a contractor a photograph of a neat sill on another house as the complete instruction. It can communicate the desired appearance, but the dimensions, background and system may differ. The useful question is how the proposed assembly will meet your existing opening, with the relevant limits shown in a drawing or clearly described.
| Feature | Information needed |
|---|---|
| Sill | Existing projection and proposed relationship to the finished face |
| Reveal | Extent of work and retained frame or trim |
| Wall below | Available height and agreed base detail |
| Adjacent ground | Current level and any planned landscaping |
| Nearby fitting | Removal, protection and reinstatement responsibility |
A long roof edge can expose an inconsistent decision
On a bungalow, the line beneath the eaves may run across much of the view from the garden. Small changes in the way a finish meets it can therefore be conspicuous. The specification should show where the render stops and how it relates to the roof edge, rather than leaving that decision to whichever section is reached first.
Look for places where the roof arrangement changes. An extension may have a different overhang, a porch may introduce a lower junction, and a gable may need a different detail from the eaves. These are separate conditions even when they are close together. A single generic section may not describe all of them.
If roofline work is already planned, coordinate it before the final render application. The purpose is to avoid completed surfaces being disturbed to fit a connection that was known about in advance. It also makes responsibility clearer: the rendering contractor and the roofline trade should know which detail each is delivering.
Wall rendering on one elevation can be a sensible first phase, but its top and side boundaries still need to work with the unchanged parts. A staged scope should finish at a deliberate point, with temporary assumptions removed before the next phase is discussed.


Choose the texture at the distance you will live with
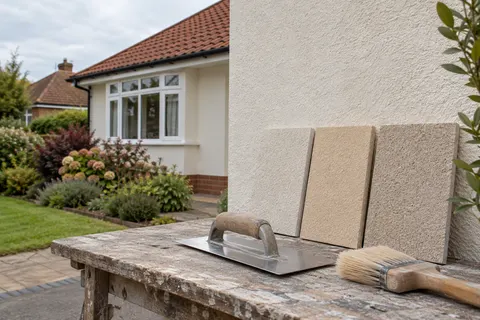
Many bungalow walls are seen at close range along a path, beside outdoor seating or through a window overlooking the garden. A finish chosen from a distant photograph may feel different in those everyday views. Look at a representative sample near the actual building and include the materials that will remain in the comparison.
A fine silicone finish is one possible appearance, but it depends on an appropriate underlying build-up. It should not be used as shorthand for making an uneven wall perfectly flat. If a long elevation catches low sunlight, discuss the background preparation and the realistic finish standard together.
Colour also changes its effect with context. A pale sample beside a white frame can look different beside dark grey or warm brick. The aim of an outdoor sample is to make that relationship visible before the whole wall is finished. Keep the agreed product and texture reference, not just a phone photograph taken under one set of conditions.
If the bungalow will be completed in stages, decide whether later work should blend with the first phase or form a deliberate contrast. Different ages and weathering can make an exact match uncertain. A sensible division at a corner may be preferable to an overconfident promise about a continuous face.
Turn the walk-round into a quotation brief
Combine the labelled elevations, retained features and unresolved details into one short document. Include access restrictions such as a conservatory, narrow side gate or planted bed that cannot be used for storage. State which entrance must remain available and whether the property will be occupied during the work.
The contractor can then price a defined scope and identify the findings that still require inspection or a trial. Where something is uncertain, keep that uncertainty attached to the relevant item. A hidden background behind old render is different from an undecided colour; the two should not be bundled into a vague allowance for preparation.
Number the photographs and refer to those numbers in the quotation. If the work excludes a sheltered return or a low wall behind planting, it can then be identified unambiguously. This simple cross-reference is particularly helpful when several elevations look similar.
At completion, use the same elevation labels for the inspection. Check the small returns and agreed edges as well as the large surfaces. This makes it easier to distinguish a genuinely omitted item from a feature that was deliberately excluded. Retain the final specification and any accepted changes for future maintenance.
The Rendering Holmes Chapel homepage connects this bungalow planning advice with the service guides and local evidence. The Census accommodation chart describes the named settlement’s housing categories; it does not identify which homes are bungalows or prove that a particular finish is locally prevalent.
Common questions
Does a low building avoid the need for planned access?
No. The working method still has to suit preparation and finishing at every part of the elevation. Obstructions, ground conditions and roof connections can make access demanding even on one storey.
Should I choose the colour before the survey?
You can collect preferences early, but the wall assessment and intended system need to be established before a final specification. A colour preference should not force an unsuitable background treatment.
What is the most useful thing to send with an initial brief?
A labelled photograph of each complete elevation, together with close-ups of the difficult junctions and a clear description of what should remain unchanged. That communicates the scope better than a wall-area estimate alone.
See housing and planning information for Holmes Chapel and nearby places, including the source and geography behind each figure.