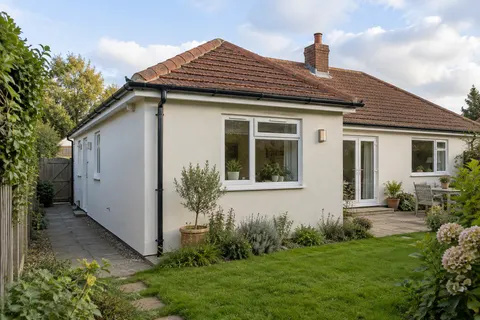
Silicone finishes
Silicone Rendering in Holmes Chapel | Finish & Preparation
Silicone render is often chosen for a fine, coloured exterior, but the visible coat is only the last part of the work. The background, base layers and junctions determine whether that finish has a suitable foundation. For a Holmes Chapel house or bungalow, the useful comparison is therefore between complete specifications, not simply between two quotations that both contain the word silicone.

On this page
Read the build-up from the wall outwards
A thin-coat finish cannot stand in for all the preparation beneath it. A proprietary system may include a particular base coat, reinforcement and primer before the decorative layer. The exact combination depends on the approved background and the manufacturer’s requirements. Ask for that combination to be named, especially where the work covers old render rather than new masonry.
Weber’s webersil TF is one example of a silicone thin-coat product intended for a suitable base or adhesive coat. Its instructions are product-specific; they are not a universal recipe for anything sold as silicone render. This distinction matters when a proposal lists one familiar brand name but leaves the rest of the assembly unspecified.
If the wall includes several backgrounds, show where each occurs. An extension, a repaired opening and an older elevation may require different preparation even when the final colour is continuous. The proposal should explain how those changes are accommodated and where an existing movement joint remains visible.
- Sound background A background accepted by the specified system. Keeping old render requires a system-specific assessment of its bond and condition.
- Beads Corner, stop and base beads set the edges and straight lines.
- Basecoat with mesh Glass-fibre mesh embedded in the basecoat resists cracking.
- Primer Where the system requires it, tinted towards the finish colour.
- Silicone finish A thin, through-coloured, water-repellent coat that forms the texture.
Wall on the left, finish on the right. Not to scale: coats, thicknesses and primers follow the chosen manufacturer’s system and the condition of the wall.
Separate surface flatness from texture
A fine texture can make variations in the underlying wall apparent in low light. If a flat-looking result is important, assess that expectation before the finish is applied. Levelling belongs within the permitted preparation and build-up; it should not be improvised by making a decorative coat thicker than intended.
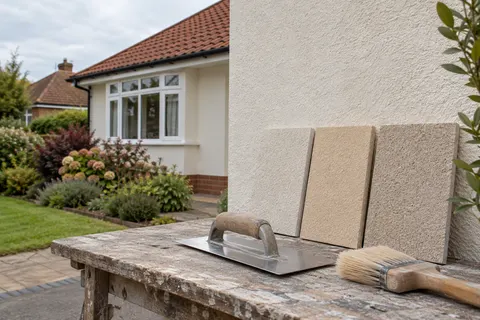
Look at a sample from the normal viewing distance. A close photograph can exaggerate grain, while a distant image may hide it altogether. The same texture will read differently on a narrow reveal and across a long bungalow elevation. Include the edges and corners in the sample discussion, since they are often the parts seen closest to eye level.
Do not confuse a fine texture with a promise of a perfectly smooth painted wall. Establish the actual finish name and grain offered. If you prefer a more mineral, scraped appearance, compare the monocouche option rather than expecting one material to imitate every other finish.
| Question | What resolves it |
|---|---|
| Will the wall look flat? | Assessment and specification of the background and levelling |
| How coarse will it look? | Named texture and a representative sample |
| Will the colour suit the house? | An outdoor sample beside retained roof, brick and frames |
| Will the edges look complete? | Agreed returns, beads and junction details |
Colour is part of the building, not a screen swatch
Place sample choices beside the window frames, roof and any brickwork that will remain. A pale finish can look warmer beside dark grey frames than beside red brick. Consider the rear elevation too: garden shade and nearby planting may change the impression even though the material is the same.
For a phased bungalow project, agree whether the later work is intended to match or merely coordinate. Keep product, colour and batch information where available, but do not treat that record as a guarantee that weathered and newly applied surfaces will look identical. A natural corner can be a more convincing division than a patch of new material on a continuous face.
If only the colour needs changing and the existing finish is sound, the respray guide is worth reading before specifying replacement. A coating proposal must still establish compatibility. The simplest-looking option is not automatically the least preparation-intensive one.
Include water-shedding details in the job
The finish around a sill or beneath a roof edge is part of the weathering arrangement. Additional thickness can reduce the apparent projection of existing features, so the proposed build-up needs to be considered before application. A neat colour does not compensate for a junction that was never resolved.
At low level, define the base of the rendered area and its relationship to paving or soil. At service penetrations, identify what is being removed, extended or reinstated. These are particularly visible on bungalows, where many of the junctions can be seen closely from a path or terrace.
The wall rendering page explains how to define a single elevation, while whole-house work considers consistency across the property. If insulation is also proposed, use the dedicated insulation guide; its junctions need their own design rather than being treated as ordinary render with an extra layer hidden behind it.


Allow the application conditions to decide the programme
A product’s application restrictions include more than whether rain is falling at that moment. Background temperature, direct sun, frost risk and drying conditions can matter. The selected manufacturer’s current instructions should determine when work proceeds and how it is protected.
Agree what happens if a planned finishing day is unsuitable. That includes protecting unfinished work, maintaining safe access and communicating the revised sequence. A fixed date should not become a reason to disregard the system requirements. The same applies if another trade delays a detail that needs to be completed before the finish.
At handover, keep the exact finish information and the maintenance instructions. If marks or damage appear later, those details help distinguish a cleaning question from a coating or repair question. For an overview of the other finishes and local evidence, return to Rendering Holmes Chapel.
Common questions
Does silicone render mean the wall is waterproof?
It should not be treated as a promise that the whole wall is waterproof. The selected system, the background and the junctions all matter. Product descriptions of water resistance refer to that product and its tested use.
Can silicone render cover any existing paint?
No blanket assumption is safe. The coating and the material beneath it need to be assessed as a background, with preparation agreed for the proposed system. Weak or incompatible layers cannot simply be ignored.
Can I choose a very fine finish for a long wall?
You can discuss that appearance, but the sample and background preparation become particularly important. View the wall in normal daylight and agree the realistic finish standard before application.
See housing and planning information for Holmes Chapel and nearby places, including the source and geography behind each figure.