Whole-house rendering
House Rendering in Holmes Chapel | Complete Exteriors
A whole-house finish should feel considered from the street, the garden and the side entrance. That does not require every surface to be identical. A brick plinth may stay exposed; a rear extension may need a different preparation; a sheltered return may be the sensible place to stop a phase. The job is to bring those decisions together before work starts, rather than solve each corner as it is reached.

On this page
Draw the complete exterior, including the parts staying put
Use a photograph or simple elevation sketch for each side of the house. Mark the surfaces to be rendered and the features to remain visible. Include the narrow returns beside windows, the wall behind a porch and the strip above an extension roof. These small areas are easily omitted from a general description of rendering the house, yet they often determine whether the result looks complete.
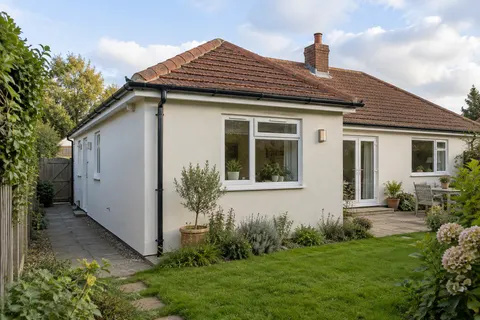
Do the same for a bungalow. A low roof can hide the top of a wall from the drive while leaving it prominent from the garden. A conservatory may divide an elevation into accessible and inaccessible sections. Agree the limits honestly; a quotation should not imply that a hidden surface will be renewed if the proposed access cannot reach it.
The specification can then distinguish appearance from construction. Several walls may share one finish while receiving different preparation. Conversely, a sound rear wall might remain unchanged while the front and sides are replaced. Both can be coherent choices if the boundaries are intentional.
- Scaffold and protection Windows, doors, paths and planting are covered; downpipes, lights and satellite brackets come off.
- Old finish tested or removed Failed render is removed; the survey decides whether any sound areas can remain within the specified system.
- Masonry repairs and beads Cracked bricks and open joints are repaired; corner, stop and base beads are fixed.
- Base coats Sand-and-cement scratch and float coats, or a manufacturer basecoat with mesh.
- Finish coat A painted, scraped or thin-coat coloured finish, applied in suitable weather.
- Fittings and junctions Fittings are refixed through the new surface; sills, roofline and abutments are sealed.
The usual order of work. The survey and the chosen products decide the actual steps.
Settle the roofline and openings first
The finished wall needs to fit beneath the eaves and around existing sills. If roofline alterations or replacement windows are already planned, coordinate their order with the rendering work. A new surface should not have to be cut back immediately because another trade needs access to a junction that could have been resolved beforehand.
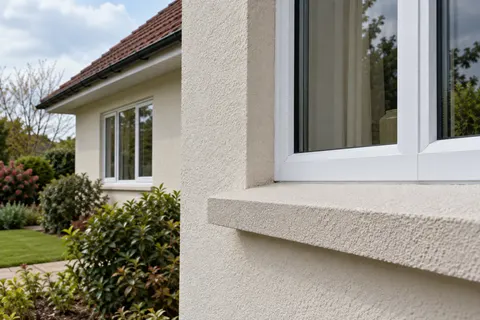
At each opening, establish what will happen to the reveal, the sill edge and any existing trim. Do not assume that a surface coating and a thicker replacement system create the same detail. The difference is greater when external wall insulation is involved. A drawing of a difficult junction is often more useful than several paragraphs calling the finish neat.
Lights, house numbers, alarm equipment and cable clips also interrupt the surface. List the items being removed or retained, and identify who is responsible for reconnection where specialist work is needed. Include future fixings if they are already known. That avoids drilling a newly completed wall simply because an obvious fitting was forgotten.
| Feature | Decision to make before application |
|---|---|
| Roof edge | How the finished thickness meets the eaves or verge |
| Windows and doors | Extent of returns and retained trim |
| Existing brickwork | Precise stopping line and protection |
| Attached conservatory | Reachable area and access method |
| Wall fittings | Removal, replacement and responsible trade |
Choose a finish you can judge on the building
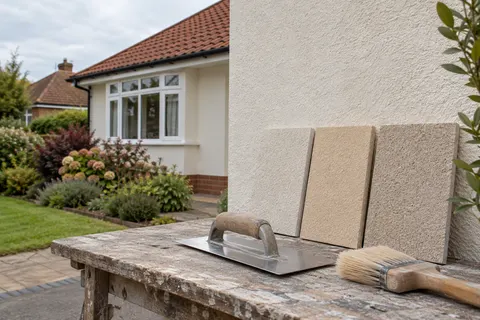
A small colour card cannot show how texture changes a broad wall. Compare samples outdoors beside the materials that are staying. A warm brick, a dark roof and a white window frame can make the same render colour appear different. View the sample from the normal approach as well as at arm’s length.
The silicone and monocouche guides describe two different finish routes. Where traditional masonry needs a compatible approach, consider the lime guide before assuming a modern system is suitable. Sand-and-cement work should likewise be identified by its intended build-up and decoration, not treated as an interchangeable substitute for every proprietary system.
Keep the agreed sample reference with the specification. If more than one material is proposed, be clear about whether the aim is a close visual relationship or an exact match. Promising identical appearance across different backgrounds and stages can conceal a decision that should be discussed openly.
Organise the work around a house that is still in use
Plan which entrance remains available, where materials will be stored and how bins or deliveries will reach the property. Protect paths and adjacent surfaces according to the work being done, particularly during removal. A tidy-looking access route is not enough if it crosses the active working area whenever someone leaves the house.
The programme should allow for the requirements of the selected materials and actual conditions. A calendar date is not a reason to apply a finish outside its instructions. Ask how incomplete elevations will be protected and what happens if work has to pause. HSE guidance makes competent access planning part of the job; the appropriate arrangement depends on the building and the work, not simply its storey count.
For a phased project, identify a sensible stopping point and the work needed to close that phase properly. Our article on changing a bungalow in two stages considers the visual side. The quotation should also account for access being installed again and for any fittings temporarily removed more than once.


Inspect the whole result before access is removed
Walk around every agreed elevation with the specification available. Look at the relationship between rendered areas and retained features, not just the middle of each wall. Confirm that the promised returns, edges and reinstated fittings are included. Any remaining work should have a clear owner and agreed next step.
Keep product and colour information, accepted variations and maintenance instructions together. These are useful if a later extension or repair has to relate to the new exterior. They do not make an invisible match certain, but they are much better than relying on a remembered colour name. For the wider choice of services and the local data, return to Rendering Holmes Chapel.
Common questions
Must every elevation be stripped back?
No. Removal should follow the condition and compatibility assessment, not the desire for one colour. The proposal should identify what remains, what comes off and how the retained background is prepared.
Is a bungalow automatically a simple job?
No. Long roof edges, low sills, conservatories and changes in level can make its details demanding. Access and preparation should be assessed for the actual arrangement.
Can a later extension use the same finish?
Keep the original specification and sample details to help with that decision. Differences in age, batches, background and exposure can affect the final appearance, so an exact match should not be assumed.
See housing and planning information for Holmes Chapel and nearby places, including the source and geography behind each figure.